[스프링 프레임워크] 웹 어플리케이션 만들기
Spring Framework Boot를 이용해서 간단한 웹 어플리케이션를 만들어보겠습니다.
1. 이클립스 설치
그 전에 먼저 이클립스를 다운받아야 합니다.
www.eclipse.org/downloads/packages/

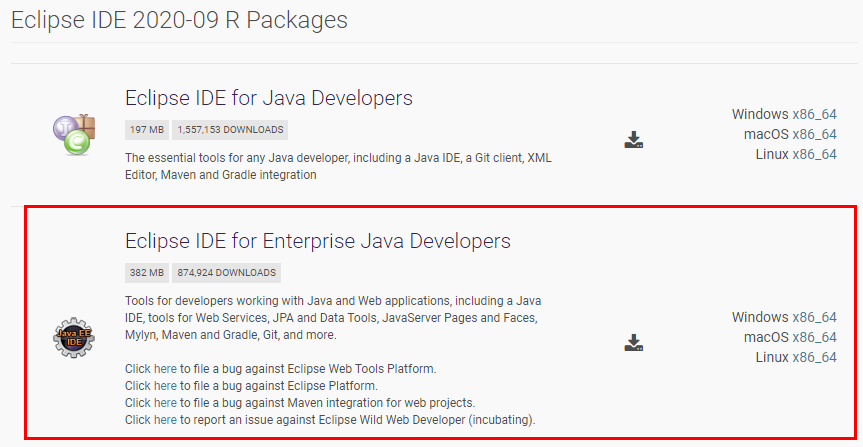
위의 사이트에서 Eclipse IDE for Enterprise Java Developers 버전을 다운 받아야합니다. Eclipse IDE for Java EE라고도 불립니다. (웹 개발을 해야하니 Eclipse IDE for Java Developers는 받지 마세요)
당연히 Java도 설치되어 있어야 합니다. 자세한 설명은 생략하겠습니다.
2. Spring Framework Boot 프로젝트 생성 및 이클립스에서 불러오기
스프링 프레임워크 부트 프로젝트를 생성하려면 이클립스에서 할 수도 있지만 그냥 공식 홈페이지 start.spring.io/ 에서 생성하는게 더 편합니다.

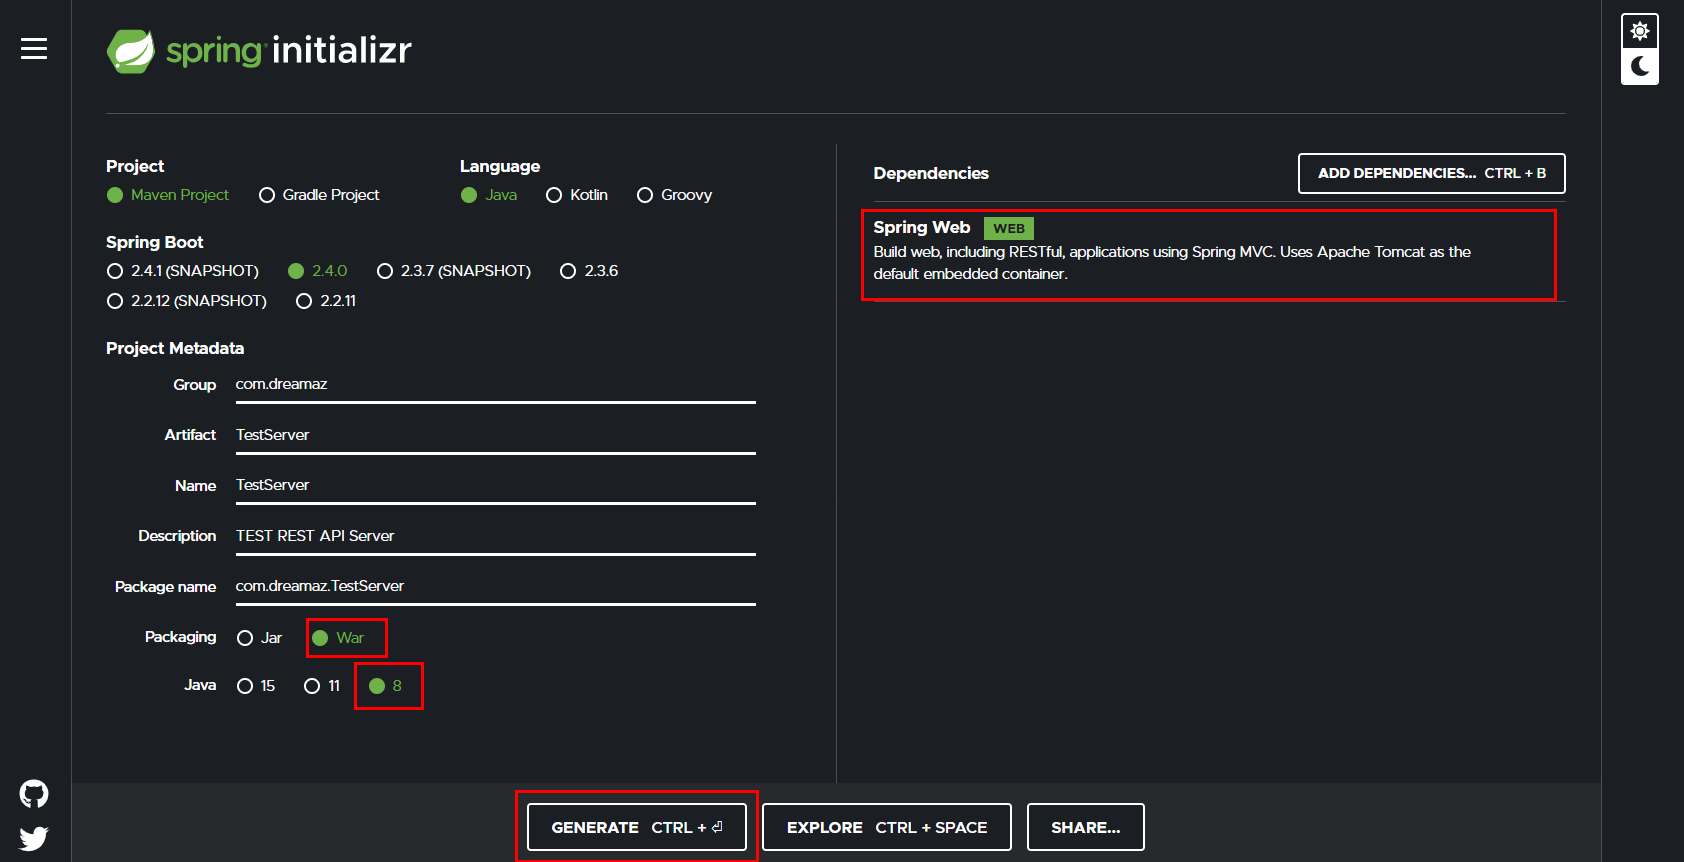
여기서 중요한 것은 웹 개발을 위해 Dependencies에 WEB을 추가했다는 점입니다. 그리고 나중에 실제 서버에 업로드하기 위해 Jar가 아닌 War를 선택했습니다. 왼쪽 아래의 GENERATE 버튼을 클릭하면 압축 파일이 생성됩니다. 이 파일의 압축을 풀어서 프로젝트를 시작할 수 있습니다.
그리고 제 컴퓨터에 현재 설치된 버전은 자바 8 버전이라 스프링 프레임워크에서 사용하는 자바 버전도 8로 변경했습니다. 자신의 자바 버전에 맞는 것을 선택해주세요.

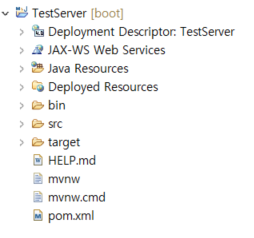
이클립스 > File > Import Projects from File System or Archive를 이용해 프로젝트를 가져옵니다.

다행히 에러가 없는 것 같네요.
<?xml version="1.0" encoding="UTF-8"?>
<project xmlns="http://maven.apache.org/POM/4.0.0" xmlns:xsi="http://www.w3.org/2001/XMLSchema-instance"
	xsi:schemaLocation="http://maven.apache.org/POM/4.0.0 https://maven.apache.org/xsd/maven-4.0.0.xsd">
	<modelVersion>4.0.0</modelVersion>
	<parent>
		<groupId>org.springframework.boot</groupId>
		<artifactId>spring-boot-starter-parent</artifactId>
		<version>2.4.0</version>
		<relativePath/> <!-- lookup parent from repository -->
	</parent>
	<groupId>com.dreamaz</groupId>
	<artifactId>TestServer</artifactId>
	<version>0.0.1-SNAPSHOT</version>
	<packaging>war</packaging>
	<name>TestServer</name>
	<description>TEST REST API Server</description>

	<properties>
		<java.version>1.8</java.version>
	</properties>

	<dependencies>
		<dependency>
			<groupId>org.springframework.boot</groupId>
			<artifactId>spring-boot-starter-web</artifactId>
		</dependency>

		<dependency>
			<groupId>org.springframework.boot</groupId>
			<artifactId>spring-boot-starter-tomcat</artifactId>
			<scope>provided</scope>
		</dependency>
		<dependency>
			<groupId>org.springframework.boot</groupId>
			<artifactId>spring-boot-starter-test</artifactId>
			<scope>test</scope>
		</dependency>
	</dependencies>

	<build>
		<plugins>
			<plugin>
				<groupId>org.springframework.boot</groupId>
				<artifactId>spring-boot-maven-plugin</artifactId>
			</plugin>
		</plugins>
	</build>

</project>
pom 내용

간단하게 메인 파일을 자바로 실행해보겠습니다. TestServerApplication.java 파일을 마우스 오른쪽 클릭하고 Run As > Java Application을 클릭합니다.

콘솔창에 위와 같은 화면이 뜨면 됩니다.
흠.. 그런데 로그에서 localhost의 IP주소가 안보이네요?
브라우저의 주소창에
localhost:8080
혹은
127.0.0.1:8080
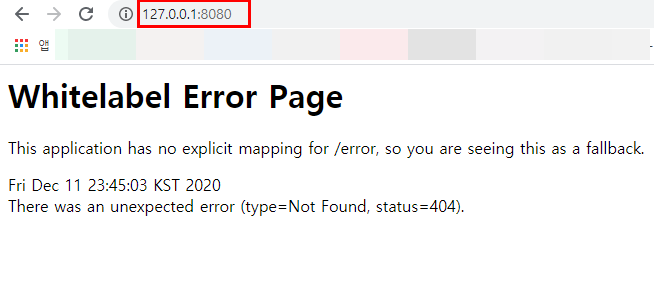
을 입력하면.. 빈 깡통의 웹 어플리케이션을 만들었으므로 아래의 화면이 뜹니다. ㅎㅎ

다음 포스팅에서 이 웹 어플리케이션에 내용을 채워보겠습니다.
참고
docs.spring.io/spring-boot/docs/2.1.9.RELEASE/reference/html/howto-embedded-web-servers.html
78. Embedded Web Servers
Each Spring Boot web application includes an embedded web server. This feature leads to a number of how-to questions, including how to change the embedded server and how to configure the embedded server. This section answers those questions. 78.2 Disablin
docs.spring.io
tomgregory.com/deploying-a-spring-boot-application-into-aws-with-jenkins/
Deploying a Spring Boot application into AWS with Jenkins (part 3 of microservice devops series)
Welcome to the third and final part of this three part series where we're taking a Spring Boot application from inception to deployment, using Docker and all the current best practices for continuous integration with Jenkins. In this final article, we'll t
tomgregory.com
댓글 영역